

On average, we need about 2 hours to assemble a PC. This assumes that all the components are compatible and this does not include any kind of research or software installation and configuration. So to ensure a smooth assembly, choosing the right parts and making sure they are all compatible with each other is imperative.
How long will assembling a PC take you? You guessed it, it depends. But let’s take a look at the factors that will determine the time spent on building a PC. We will take into consideration your level of experience, research time needed, parts availability and delivery as well as the actual assembly time.
Is Building a Custom PC Difficult?
Building a PC can be quite challenging for someone who has never done it before, however not impossible and surely very rewarding. A few major things to consider are parts compatibility, making sure you avoid static when assembling your system as well as being extra cautious so as to not damage any connectors or pins when putting everything together. And like any other test in life, preparation is key to successful completion.
Timeline Factors to Consider
Planning a computer build can take a few hours to a few days, depending on your level of experience, parts availability and the complexity of the desired PC. Just like any other purchase that you want to last for years ahead to come, you do not want to rush the purchase, and you want to make sure it meets your needs as closely as possible. This requires you to do a bit of work that we will break down below into simple steps.
Experience Level
Knowing what the system will be used for is imperative in choosing the right equipment. You do not want to buy a part that will result in a performance bottleneck when running your editing software, nor do you want to spend unnecessary hundreds or thousands of dollars on a powerful graphics card that you will never take advantage of.
This is where your level of experience with computer hardware will dictate how long you will spend researching the parts needed. Will you choose an integrated graphics card or a dedicated one? A higher CPU frequency over core count, or the other way around? The more granular you will be in researching the needed parts, the better your new system will fit your needs. Let’s actually help you get this part done.
Research/Planning
Make a list of the more powerful software and games that you will be running, then use tools like ‘can you run it’ if you are planning on gaming, or read the software vendor’s webpages for hardware requirements if you need to run powerful tools on your new system. Create a list of needed parts, according to your desired configuration as you go, since you will need this in the next step of the process.
Once you have inventoried all the needed parts, use resources on the internet to check for any compatibility issues. Websites like pcpartpicker and newegg custom pc builder can help you identify any compatibility issues and adjust your inventory accordingly. Check parts availability with your reseller(s) of choice in the process so you don’t have to go back and forth numerous times, due to specific parts being unavailable.
Beyond parts compatibility, you may want to consider the type and number of ports available, the form factor to fit your space, as well as any other software and peripherals to be ordered. All the above can take anywhere from one hour to a few good hours.
Parts Ordering
Order your parts with warranty and return policies in mind. No one wants their components to fail, but sometimes they do. Plan ahead for situations like these, as this can cost more than money down the road. Ordering from a local computer shop or trusted sources with smooth return policies or in-store replacement may be a better option than ordering straight from China. Also, don’t forget to check the delivery time, as one delayed component will delay the entire assembly.
Steps in the PC Building Process
Parts have arrived and you’re excited to get to work. But if you’ve never assembled a PC before, it can be quite intimidating, especially since you’ve spent a fair amount of money. Staying organized during the assembly can save you a lot of trouble as well as avoid having to remove and reinstall parts due to incorrect order of assembly. Let’s take it one step at a time.
Unbox and Prepare Parts
It is a good idea to unbox everything and not just one part at a time. Having everything laid out can give you a better understanding of the available space inside the case, the size of each component, as well as making sure you aren’t missing any necessary component in the puzzle.
Do not lay any parts on fabric material or metal and preferably keep them inside their static-free protective bags until the actual assembly. Ideally, you want to have a hard flat surface and an anti-static matt. However, most people don’t so please at least ground yourself or wear rubber gloves during the assembly.
Prepare the Case and Install Fans
Most cases come with a few fans pre-installed. If you would like to add additional ones, now is the time to do so, as doing so later, can prove quite difficult if not impossible. Also, the existing fans wiring needs to be properly rerun most probably, since manufacturers will not do any cable management when installing these. Cable management accessories like zip ties, clips and velcro can be found within the case, inside plastic bags. Use diligently as you will need some of these for the parts you will be installing later.
Check your logic board hole pattern and install the necessary studs on your case. Make sure there are no studs that do not match the holes pattern on the logic board, as this can easily cause a short. This is the time when you also want to install the logic board I/O backplate as well as remove any bracket plates in order to make room for your graphics card. Knocking those off after installing the logic board, can damage it.
Install the Power Supply (PSU)
You want to install the power supply first as doing this after mounting the logic board may be impossible. If you have a modular power supply, only install the necessary cabling and nothing extra, in order to keep the build as clean as possible. This is where laying out all the parts comes in handy. Check your GPU to see how many power rails it needs, as well as how many HDDs or extra CPU connectors are needed.
Place the PSU facing down and run the cabling out and to the side of the case, where the logic board needs to be installed. Do not try to do any more cabling management at this point. You could plug the PSU power now and leave the PSU switch turned off. This will have your whole unit grounded during the assembly, avoiding static discharge. If the PSU does not have a power switch, then do not plug the power cord just yet.
Install CPU, RAM, nVME and Cooler
If you do not have a static-free mat for assembly, I suggest you always place the static-free bag that came with your logic board between the assembly surface and the logic board.
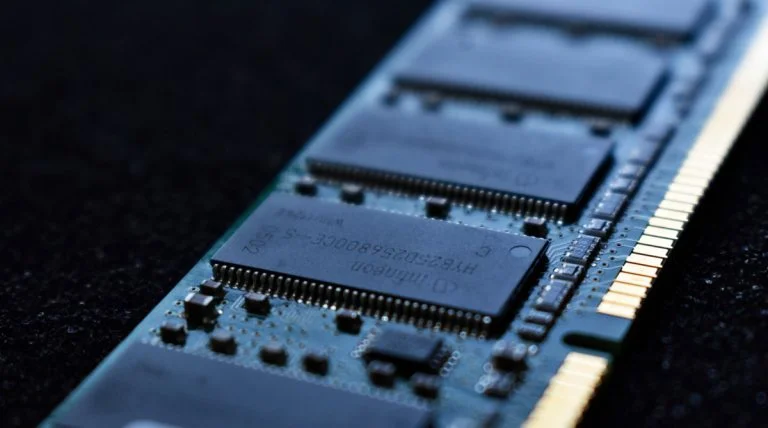
Installing the RAM first is a good idea since bulky cooling systems can often cover some of the slots, making it impossible to do after. This is easy, just release both top and bottom notches, or just the top on some boards and snap it in place. Do not be afraid to push hard until it snaps in place. Just make sure the logic board rests on a hard flat surface before you do this. If you purchased an nVME drive, snap that in now as well.
Remove the stock backplate from your logic board and install the one that matches your CPU pinhole. Carefully check the CPU for notches or pointing arrows. These will be matched on the motherboard socket to avoid incorrect CPU installation. Remove the socket plastic cover on the logic board and place the CPU gently into the socket. Lock the latch in place by pressing down on it and securing it under the hook.
If you use a heatsink and fan for cooling, then you should install these now. However, if you use a water pump and radiator, you should first install the logic board inside the case, and then the radiator and pump. If there are extra fans to be mounted on the heat sink, mount them before installing the heat sink.
Take your time in reading the installation guide for your cooling system, as this is the most challenging step during the assembly. Also note that some heat sinks and water pumps come with thermal paste pre-applied to their surface, where you would just need to peel off the protective film and mount them. If that is not the case, apply a pea-size drop of a thermal compound that was either shipped along with your cooling solution or purchased by you separately. Do not attempt to spread the compound, rather let the built-up pressure take care of that.
Mount the Motherboard
Once you have installed the RAM, CPU and eventually the cooling system, place the motherboard inside the case and secure it with screws. Check once again to make sure all studs on the case match the board pattern to avoid any kind of shorts before you do so.
We suggest checking the motherboard manual and identifying the connectors and pins physical layout before plugging in any connectors. The usual wiring that needs to be connected at this point are the power switch, activity led, reset button, USB and audio connectors as well as the main 24 PIN power and any additional 4 PIN CPU ones.
You want to run your cabling as clean as possible and connect everything to the logic board before moving on to the next steps, as access to these will be heavily restricted by the GPU. Use the closest available holes to run every wire out of the case to the side, then back in through the closest available hole to the desired connector on the motherboard. That will expose a minimum amount of wiring, which is your goal for both great airflow and visual, in the case of a transparent case.
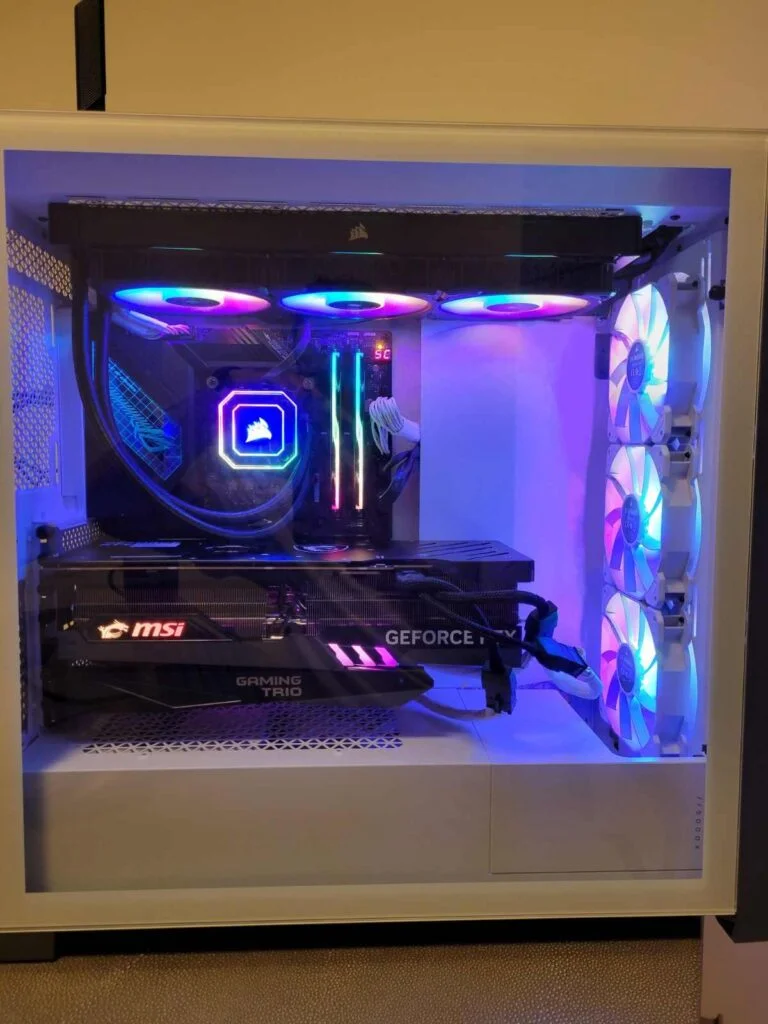
Fans should be connected either to the logic board pins or to the manual controller that was delivered with your cooling system. This depends on your preference and how you want to control the RGB lighting on your system, but typically connecting them to the logic board offers a better experience.
Connect Storage Devices (SSD / HDD)
SSDs and HDDs should be mounted either within the provided casing brackets or on the exterior side of the case while making sure you leave room for the power and SATA connectors.
Some motherboards may be delivered with expansion cards that can accommodate multiple nVME drives as well in a RAID configuration. If you are using one of these with multiple nVME drives, then mount your nVME drives into the expansion card and snap it into the bottom PCIe slot. We want to keep the top PCIe slot available for the GPU.
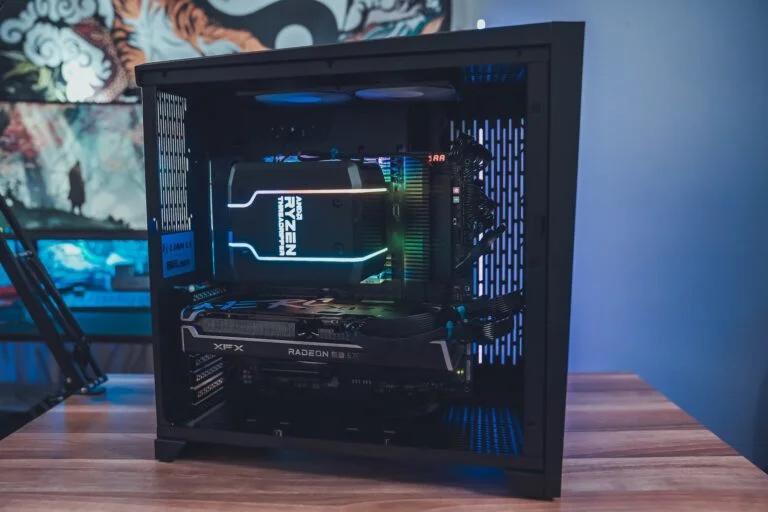
GPU Installation
We left the GPU for the very end, as this is typically the bulliest part of the puzzle and will restrict access to a lot of the logic board connectors if installed earlier in the process.
The GPU should always be installed on the top PCIe slot, unless the motherboard vendor specifies otherwise. Some of the GPU’s out there are quite heavy, requiring the installation of a supporting metal rail. This will be delivered with your GPU and should be secured with screws to the case, prior to installing the GPU.
Don’t forget to connect the power to your graphics card. Some GPUs come in a 6 PIN configuration, some with an 8 PIN and the most power-hungry ones can come even in a 3×8 PIN configuration. Hopefully, you bought a powerful enough PSU to accommodate all that.
Wiring Management
Wiring management should be done along the way, as you install the parts, as explained above. However, this is the time when you want to take a final look at the way you ran all the cabling. If there is anything obstructing the airflow inside your case, or not visually pleasing, you may want to spend that little extra time and rewire. Use zip ties but do not over-tighten them, make sure no fans are catching onto any wiring and if you are happy with the result, it is time for testing.
Testing and Troubleshooting
If you connected everything properly and there are no compatibility issues, then you should be able to boot your system and enter the UEFI setup at this point. But if that is not the case and you get no display or no power at all, let’s look at the most common scenarios that could cause these issues.
One of the most common issues we see with users building their own system that causes no display is improper RAM installation. The RAM is either not properly seated and needs reseating, or it is not installed in the correct slots. Please double-check the motherboard manual and confirm that the type of RAM you purchased is compatible with your board, as well as the proper order in which the slots need to be populated.
Another no display common issue is an outdated logic board firmware, which causes it not to recognize the probably newer type of CPU. You can fix this by flashing the BIOS in two ways, depending on what you have available at hand. The first option would be a ‘flashback’ if your motherboard supports it. The second would be to temporarily install an older CPU and an operating system, which would ultimately help you write newer firmware to your logic board.
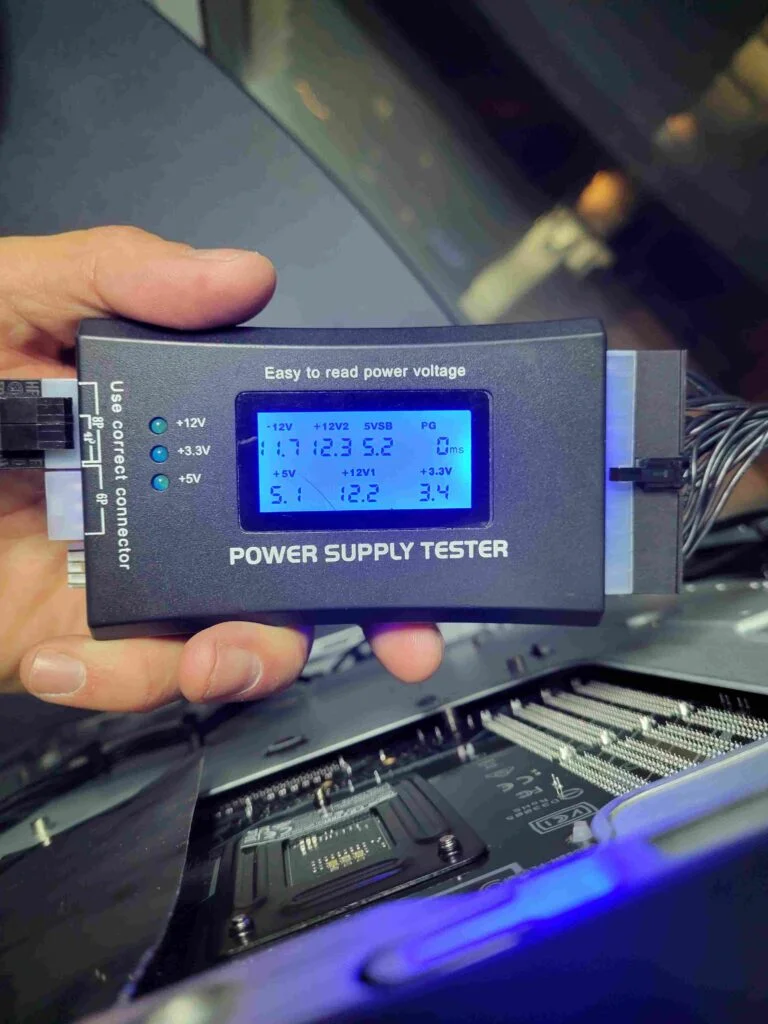
If you don’t get any power at all, then check the power switch wire and make sure it has been connected properly to the logic board. Also, check the total amount of wattage your system requires to run and compare that with your PSU wattage. PSU wattage calculators like newegg power supply calculator should help you. Also, make sure you have connected all the extra power rails to the logic board and GPU as well as once again make sure there are no studs or other metal parts underneath your logic board that could cause a short. Also, check the power supply readings with a tester. These testers can be found for cheap on Amazon and can point out failures that would otherwise go undetected. A bad PG value, for instance, can confuse a lot of people and cause all kinds of weird issues. We have seen PSUs that were faulty even if new.
Install OS and Drivers
If you were able to get through the above steps successfully, then it’s time to install the OS. But first, let’s make sure we organize the storage disks before we proceed. You may want to create the RAID configuration first if you’re planning on installing the operating system on redundant disks. If you only want to set up RAID for your data or not at all, then you can skip this step for now or altogether.
If you plan on installing Windows, then we advise you only keep the disk on which you want to install the OS connected at this time. Having any additional disks connected during this step can cause Windows setup to create the system partition on one disk and the boot partition on the other, which is not desirable. Keep the power disconnected from these other disks until the OS installation has been completed, and only then connect the power back to them.
You’re almost there. You have successfully assembled your first PC, but if Windows was your chosen operating system, then we still have to install the necessary drivers. While Windows may install all the necessary drivers for you automatically, we suggest you stop that from happening and install them yourself, manually.
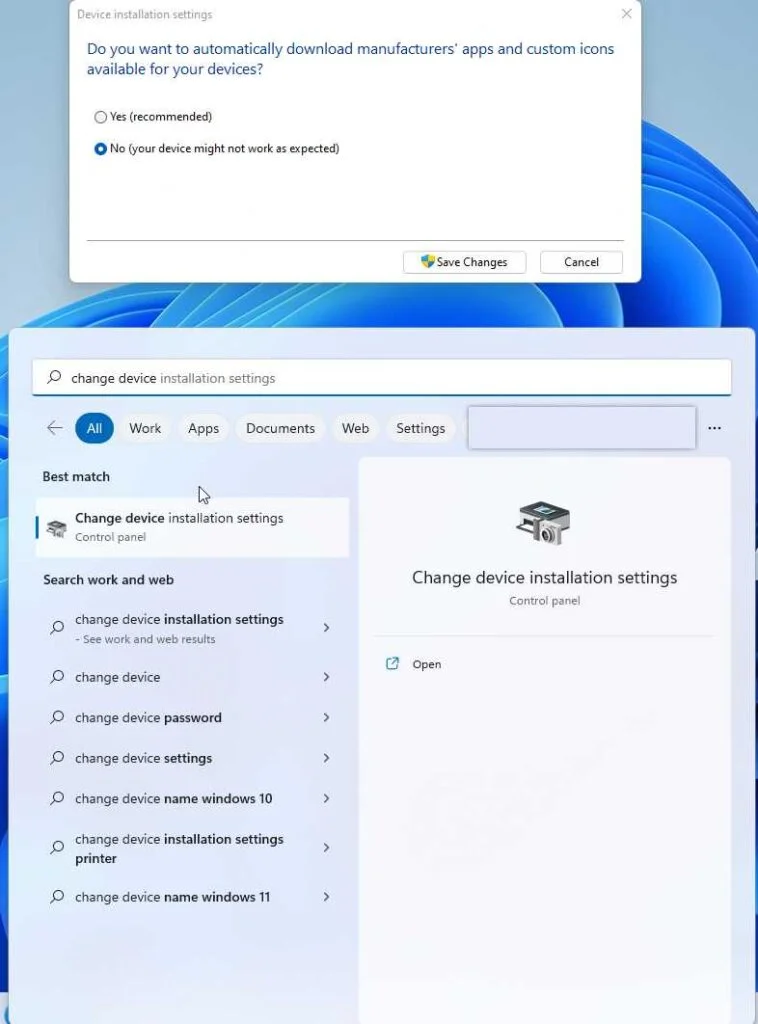
To do so, type ‘change device installation settings’ in the bottom search bar and click on it. Select no in the pop-up window and hit ‘Save Changes’. Once done, head to your motherboard’s vendor page as well as GPU’s vendor webpage, download their latest available drivers and install those instead. This can improve your system’s performance and stability.
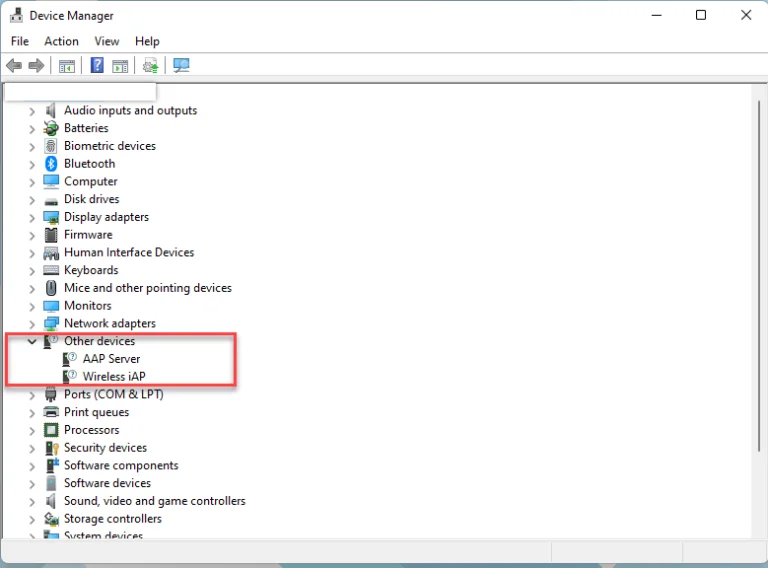
To ensure all drivers had been installed, head over to device manager and make sure there are no devices with a question or exclamation mark next to them. If there are any, you must have missed installing a specific component’s driver, or there could be an issue with the driver itself.
Key Takeaways
While a professional isn’t always required to assemble a computer, someone who has never done it before can find it quite difficult and intimidating, and for very good reasons. As you can see, the assembling of the parts is only one part of the equation and this article only scrapes the surface of what the whole process entails.
There are plenty of more in-depth resources out there that focus in more detail on each aspect of the process. If you have never assembled a computer before, then we strongly suggest you properly research each of the components you are about to order and watch tutorials on the internet beforehand.
Should you need any kind of assistance, from choosing the right parts to actually assembling them, do not hesitate to contact us. We offer A to Z computer build services from identifying the right parts according to your needs to supplying and assembling them as well as installing all the necessary software.